


In this guide, we'll show you step by step how to replace the charging port or charging port cover on your VMAXVX2 PRO E-Scooter VX2 PRO .
Tools Required
- Phillips screwdriver
- 16 mm open-end wrench
- Optional: spray adhesive or hot glue
Instructions
Remove the rubber mat and open the maintenance hatch
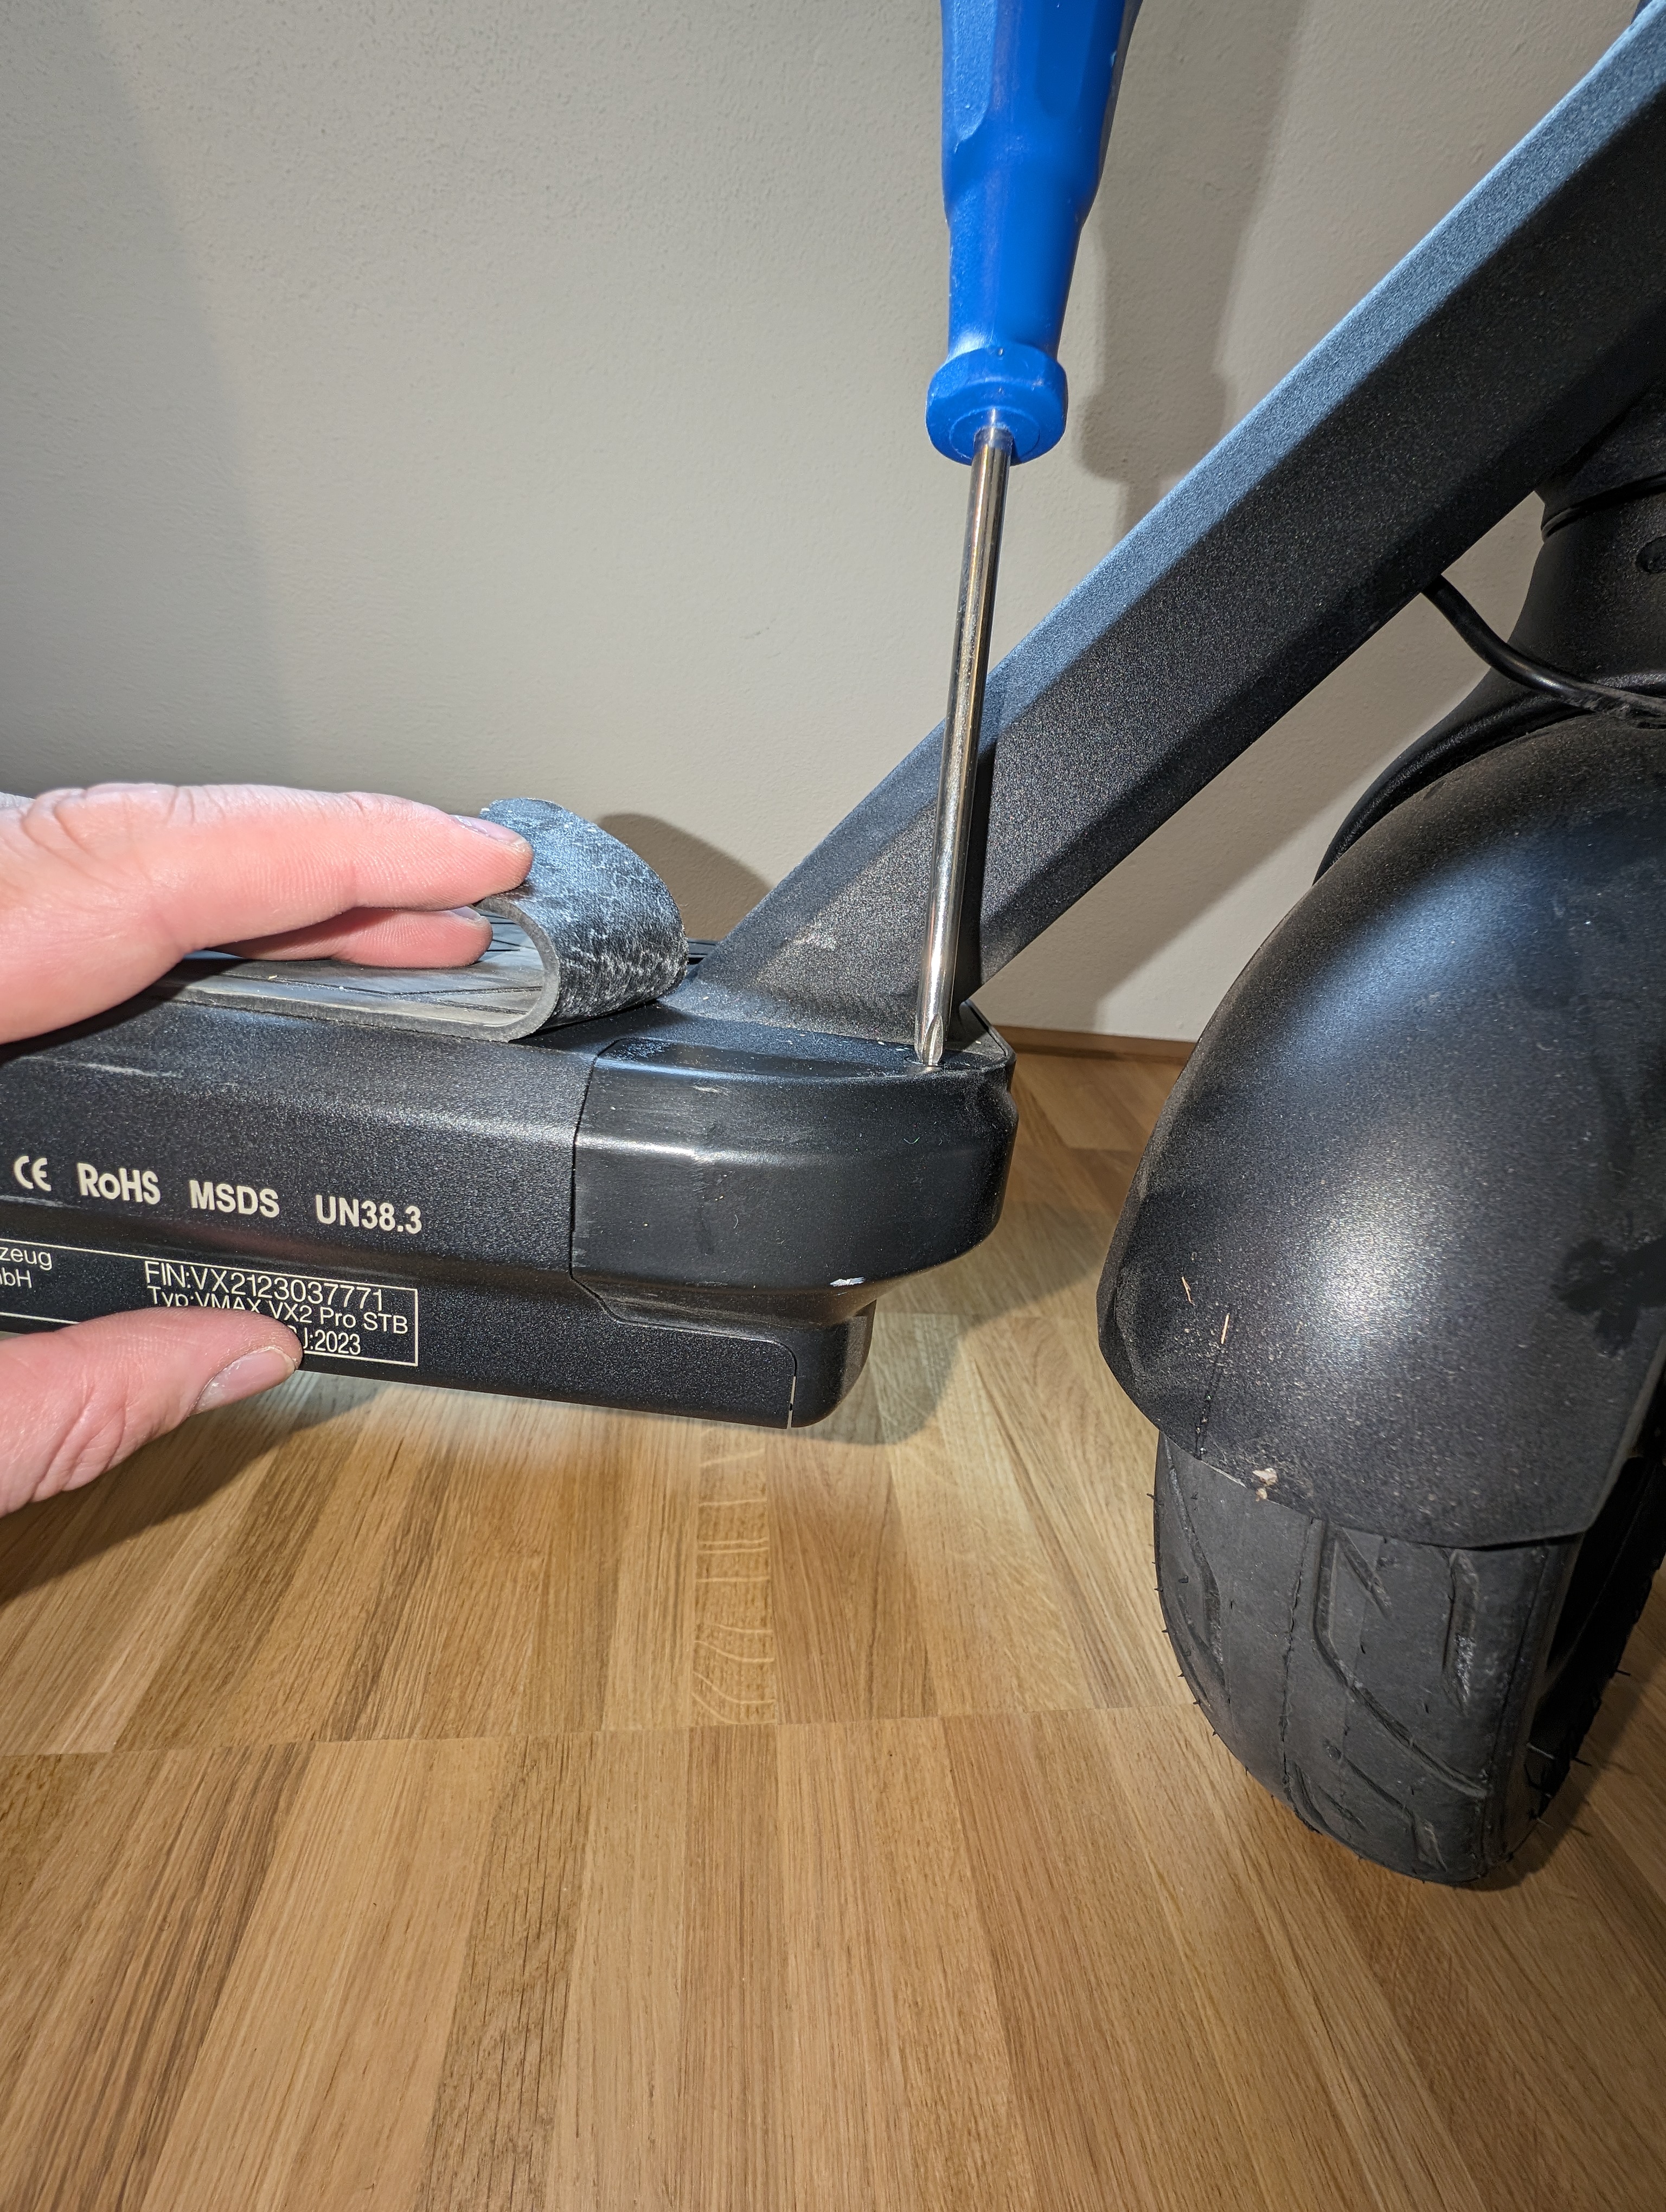
The charging port is located in the maintenance flap at the front of your scooter. First, remove the rubber mat at the front of your scooter, and then loosen the four screws on the maintenance flap.
There are two screws at the top and two at the bottom of the running board.
Remove the maintenance cover and disconnect the plug
Next, carefully remove the maintenance cover and disconnect the plug connection between the charging port and the battery.
Remove the charging port
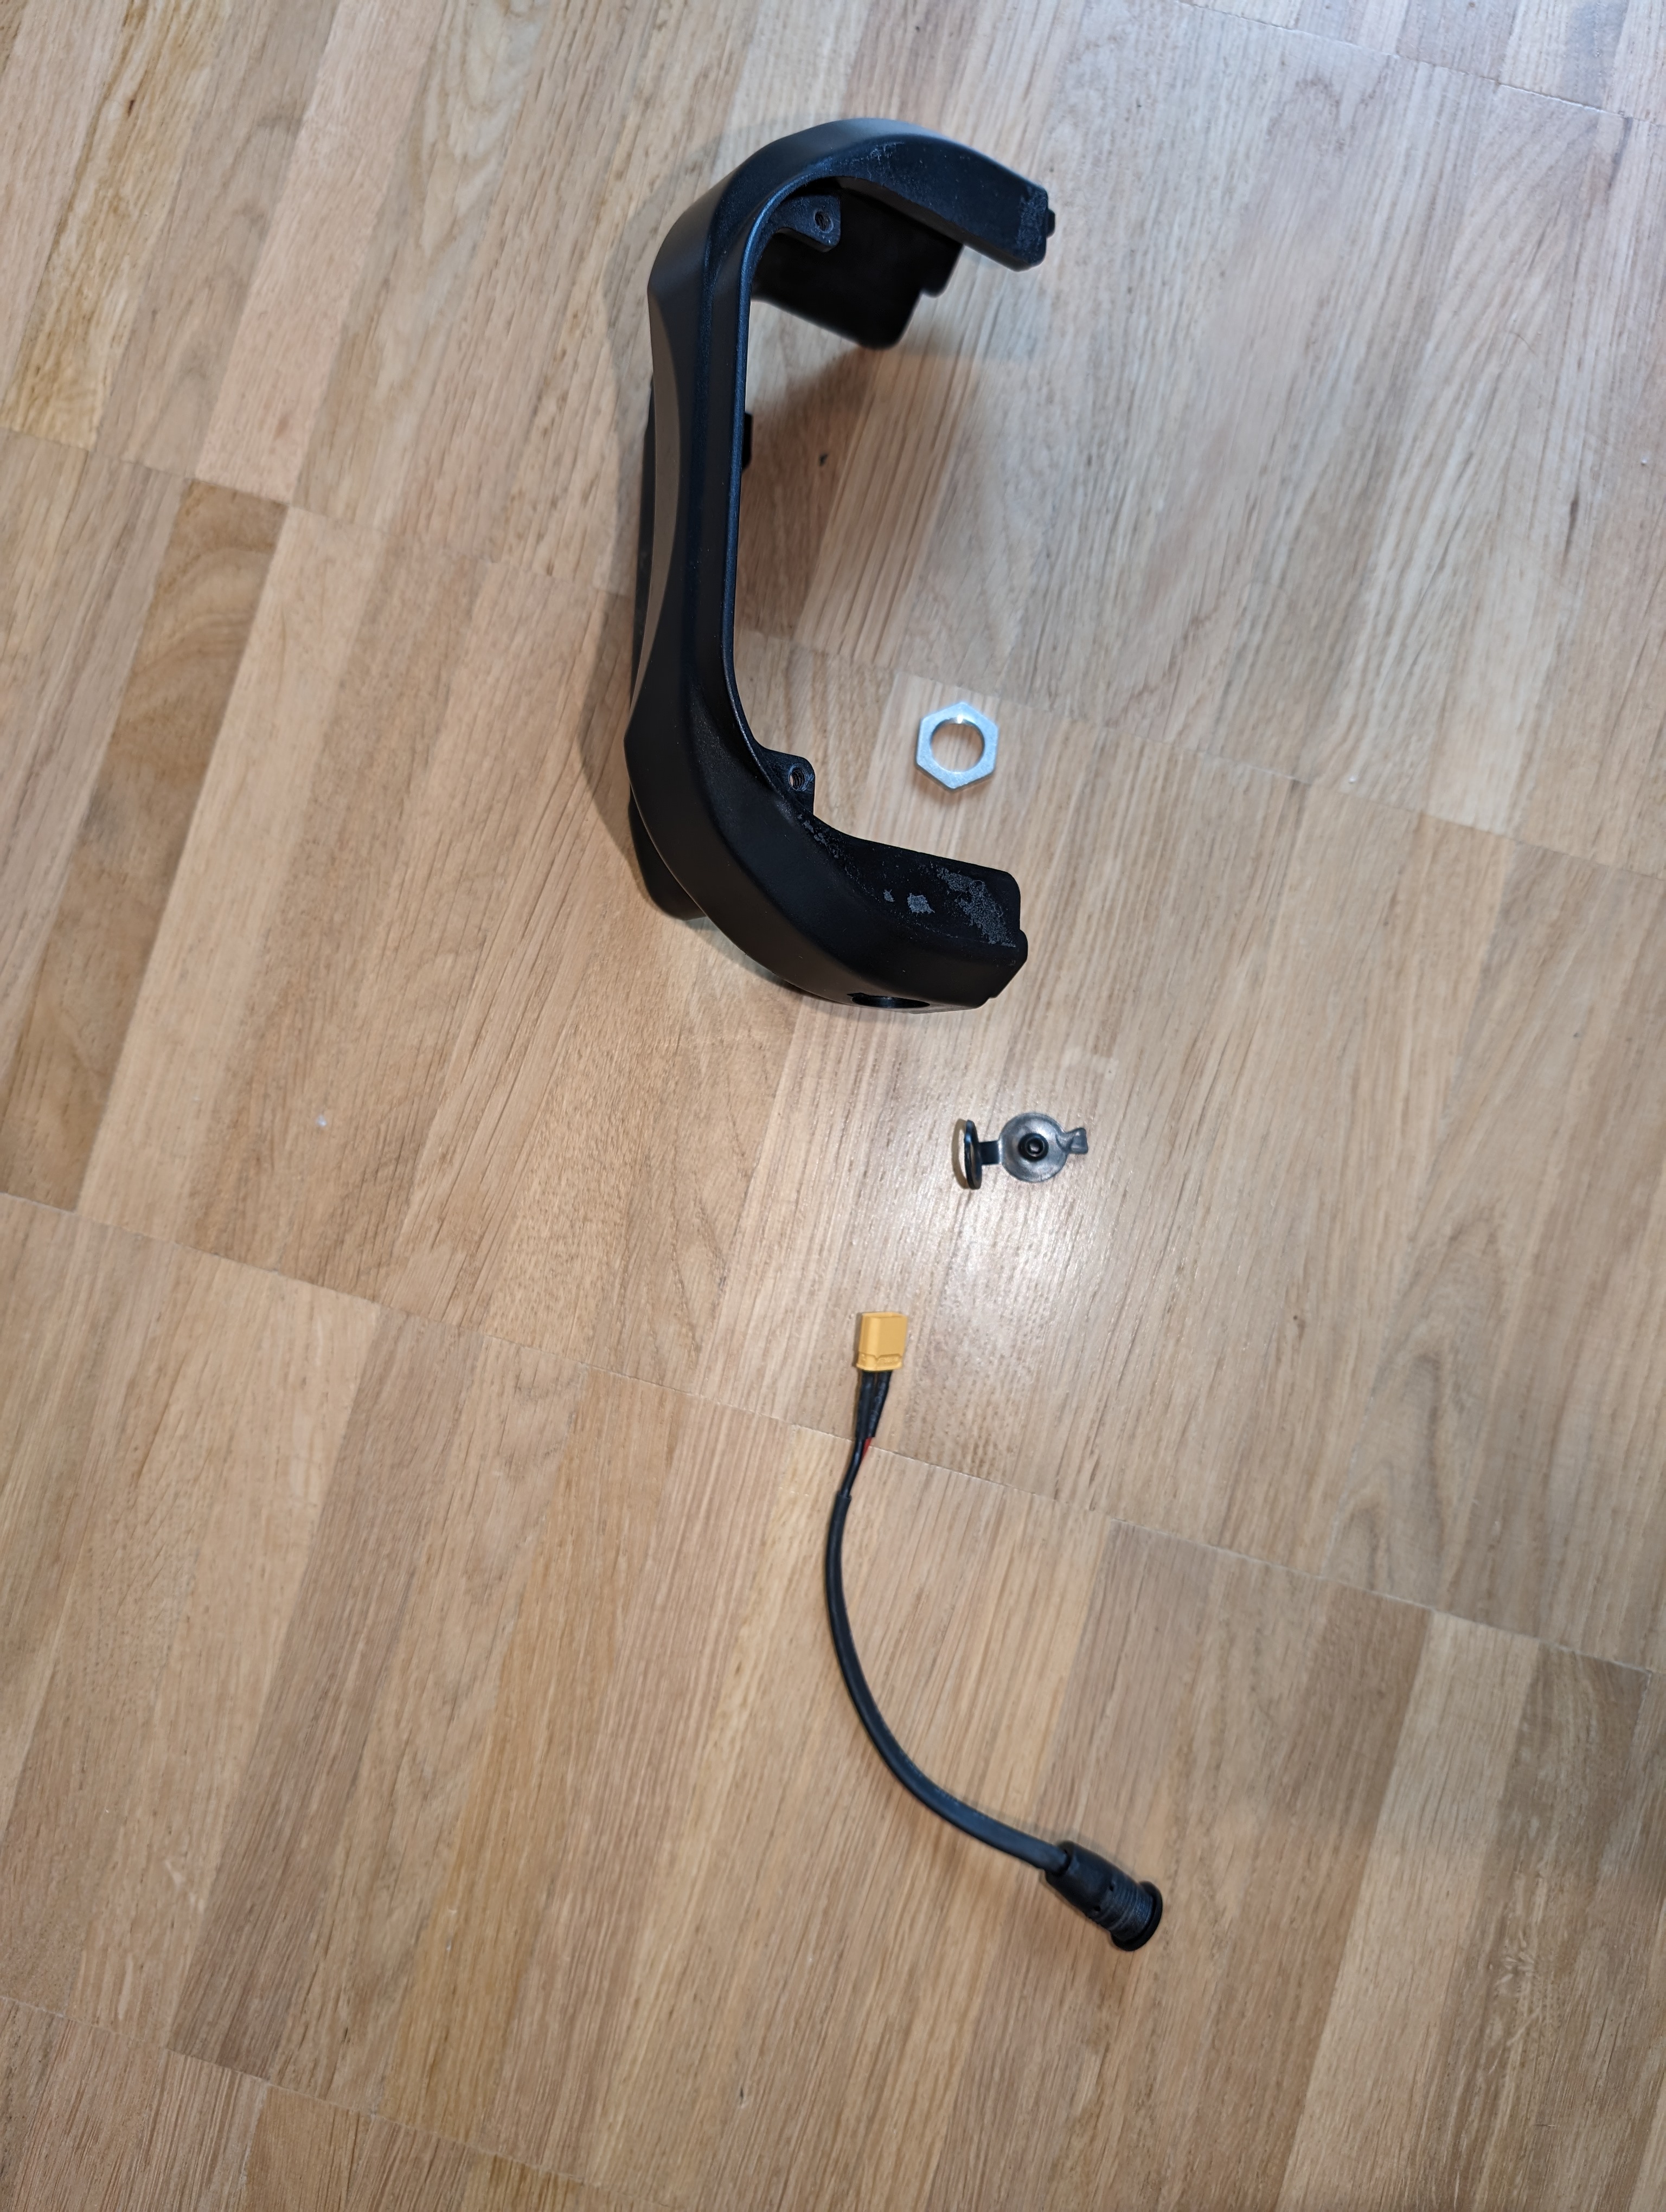
Next, you can loosen the lock nut on the charging port and remove the charging port from the access panel.
Install new parts
Now replace the necessary parts and reinstall the new charging port or charging port cover correctly.
Reinstall the maintenance hatch
Once you've replaced the necessary parts, you can reinstall the maintenance panel.
The rubber mat will usually stay firmly attached to your scooter. If you want to help it stick better, use some spray adhesive or hot glue. Be sure not to get any glue on the screws.
Check the result
After assembly, check that the charging port is securely in place, the cover closes properly, and the connector is properly connected. Also check that the maintenance flap fits snugly and that the rubber mat is securely fastened again.
Frequently Asked Questions
Here you'll find answers to frequently asked questions about this repair.
Do I always have to remove the entire maintenance hatch?
Yes, because the charging port is built into the maintenance flap. That's the only way you can get clean access to the connector and the lock nut.
Can I reuse the rubber mat after installation?
In most cases, yes. It usually sticks well. If necessary, you can use a little spray adhesive or hot glue to help it stick. Just be careful not to glue any screws together.
What should I do if the charging port doesn't fit properly after I've replaced it?
Check to make sure the charging socket is properly inserted into the access panel and that the lock nut is tightened securely. Also check the connector to the battery.