


In this guide, we'll show you, step by step, how to replace the controls on the handlebar of your VMAX E-Scooter yourself.
Tools Required
- Allen 2,5 mm
- Allen 3 mm
- Allen 5 mm
- Scissors
- Electrical tape or heat-shrink tubing
- Hot-air dryer or lighter
Instructions
Remove the headlight
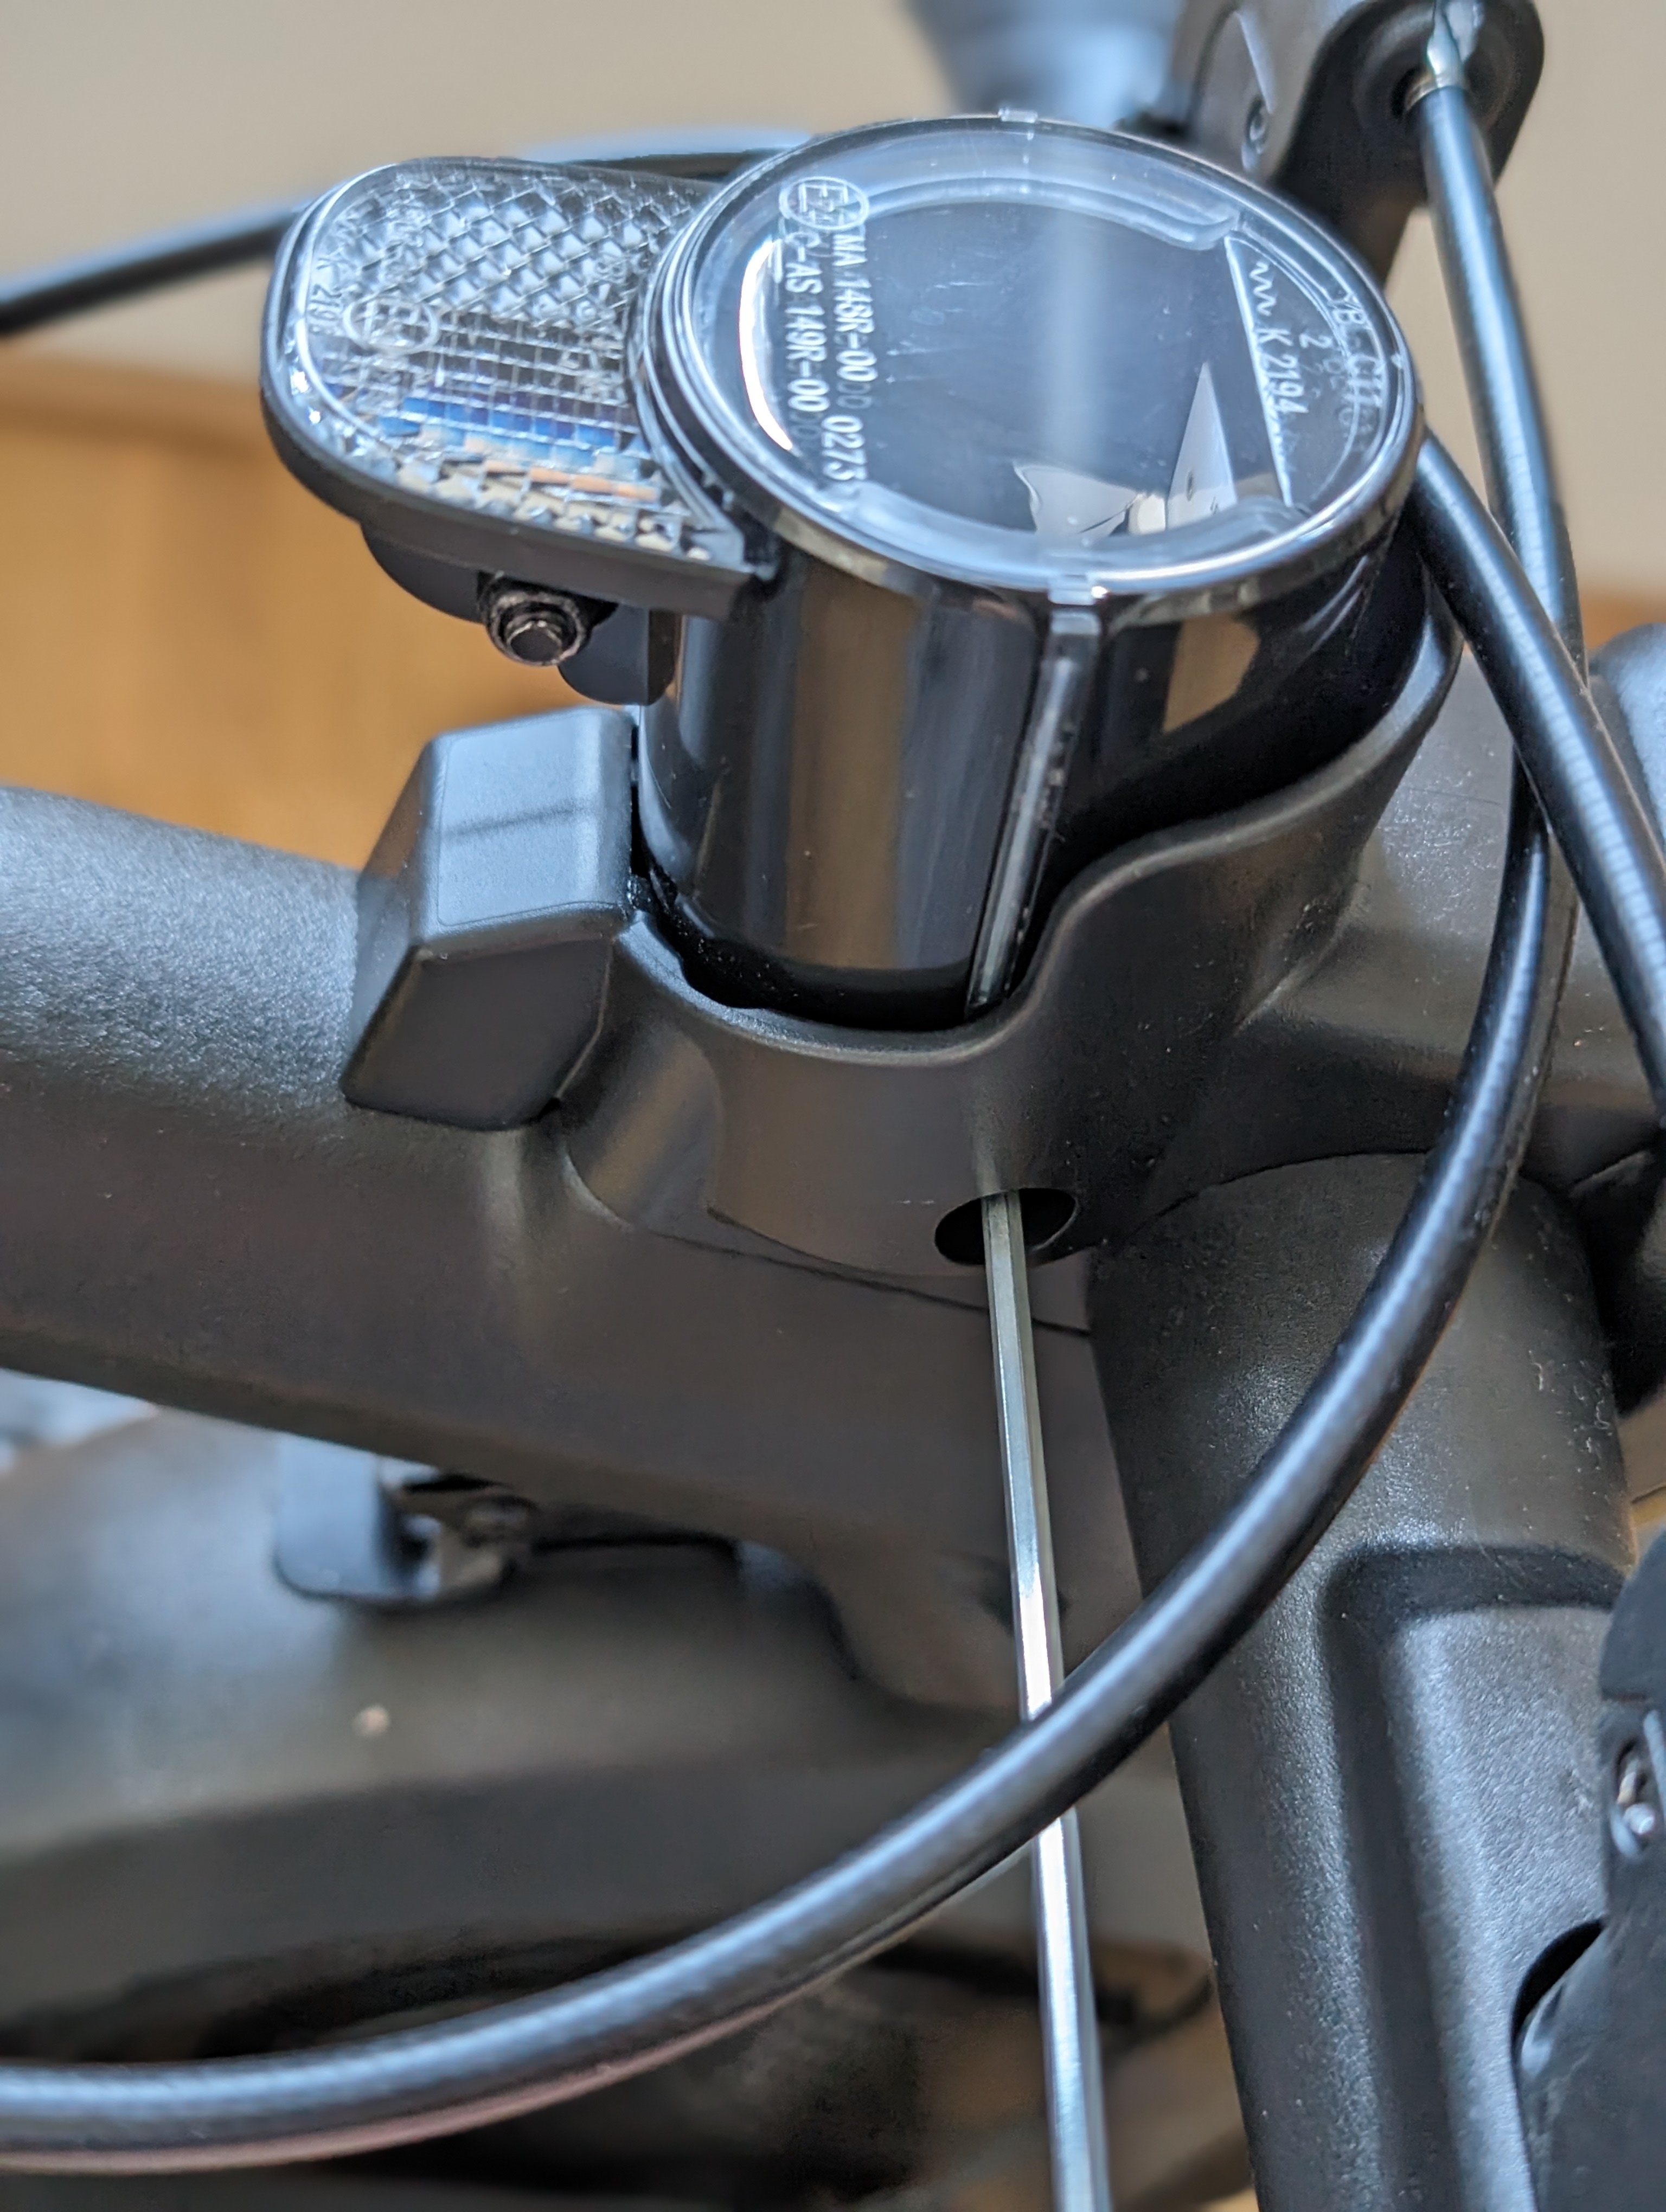
The wiring for your handlebar assembly is located behind the headlight. Therefore, start by removing the headlight by unscrewing the retaining screw behind the opening.
Remove the headlight cover

Now you can see the screws that hold the headlight cover in place. Remove them to gain access to the wiring.
Loosen the handlebars
Loosen the handlebar clamp. It is secured to the handlebar stem with four Allen screws.
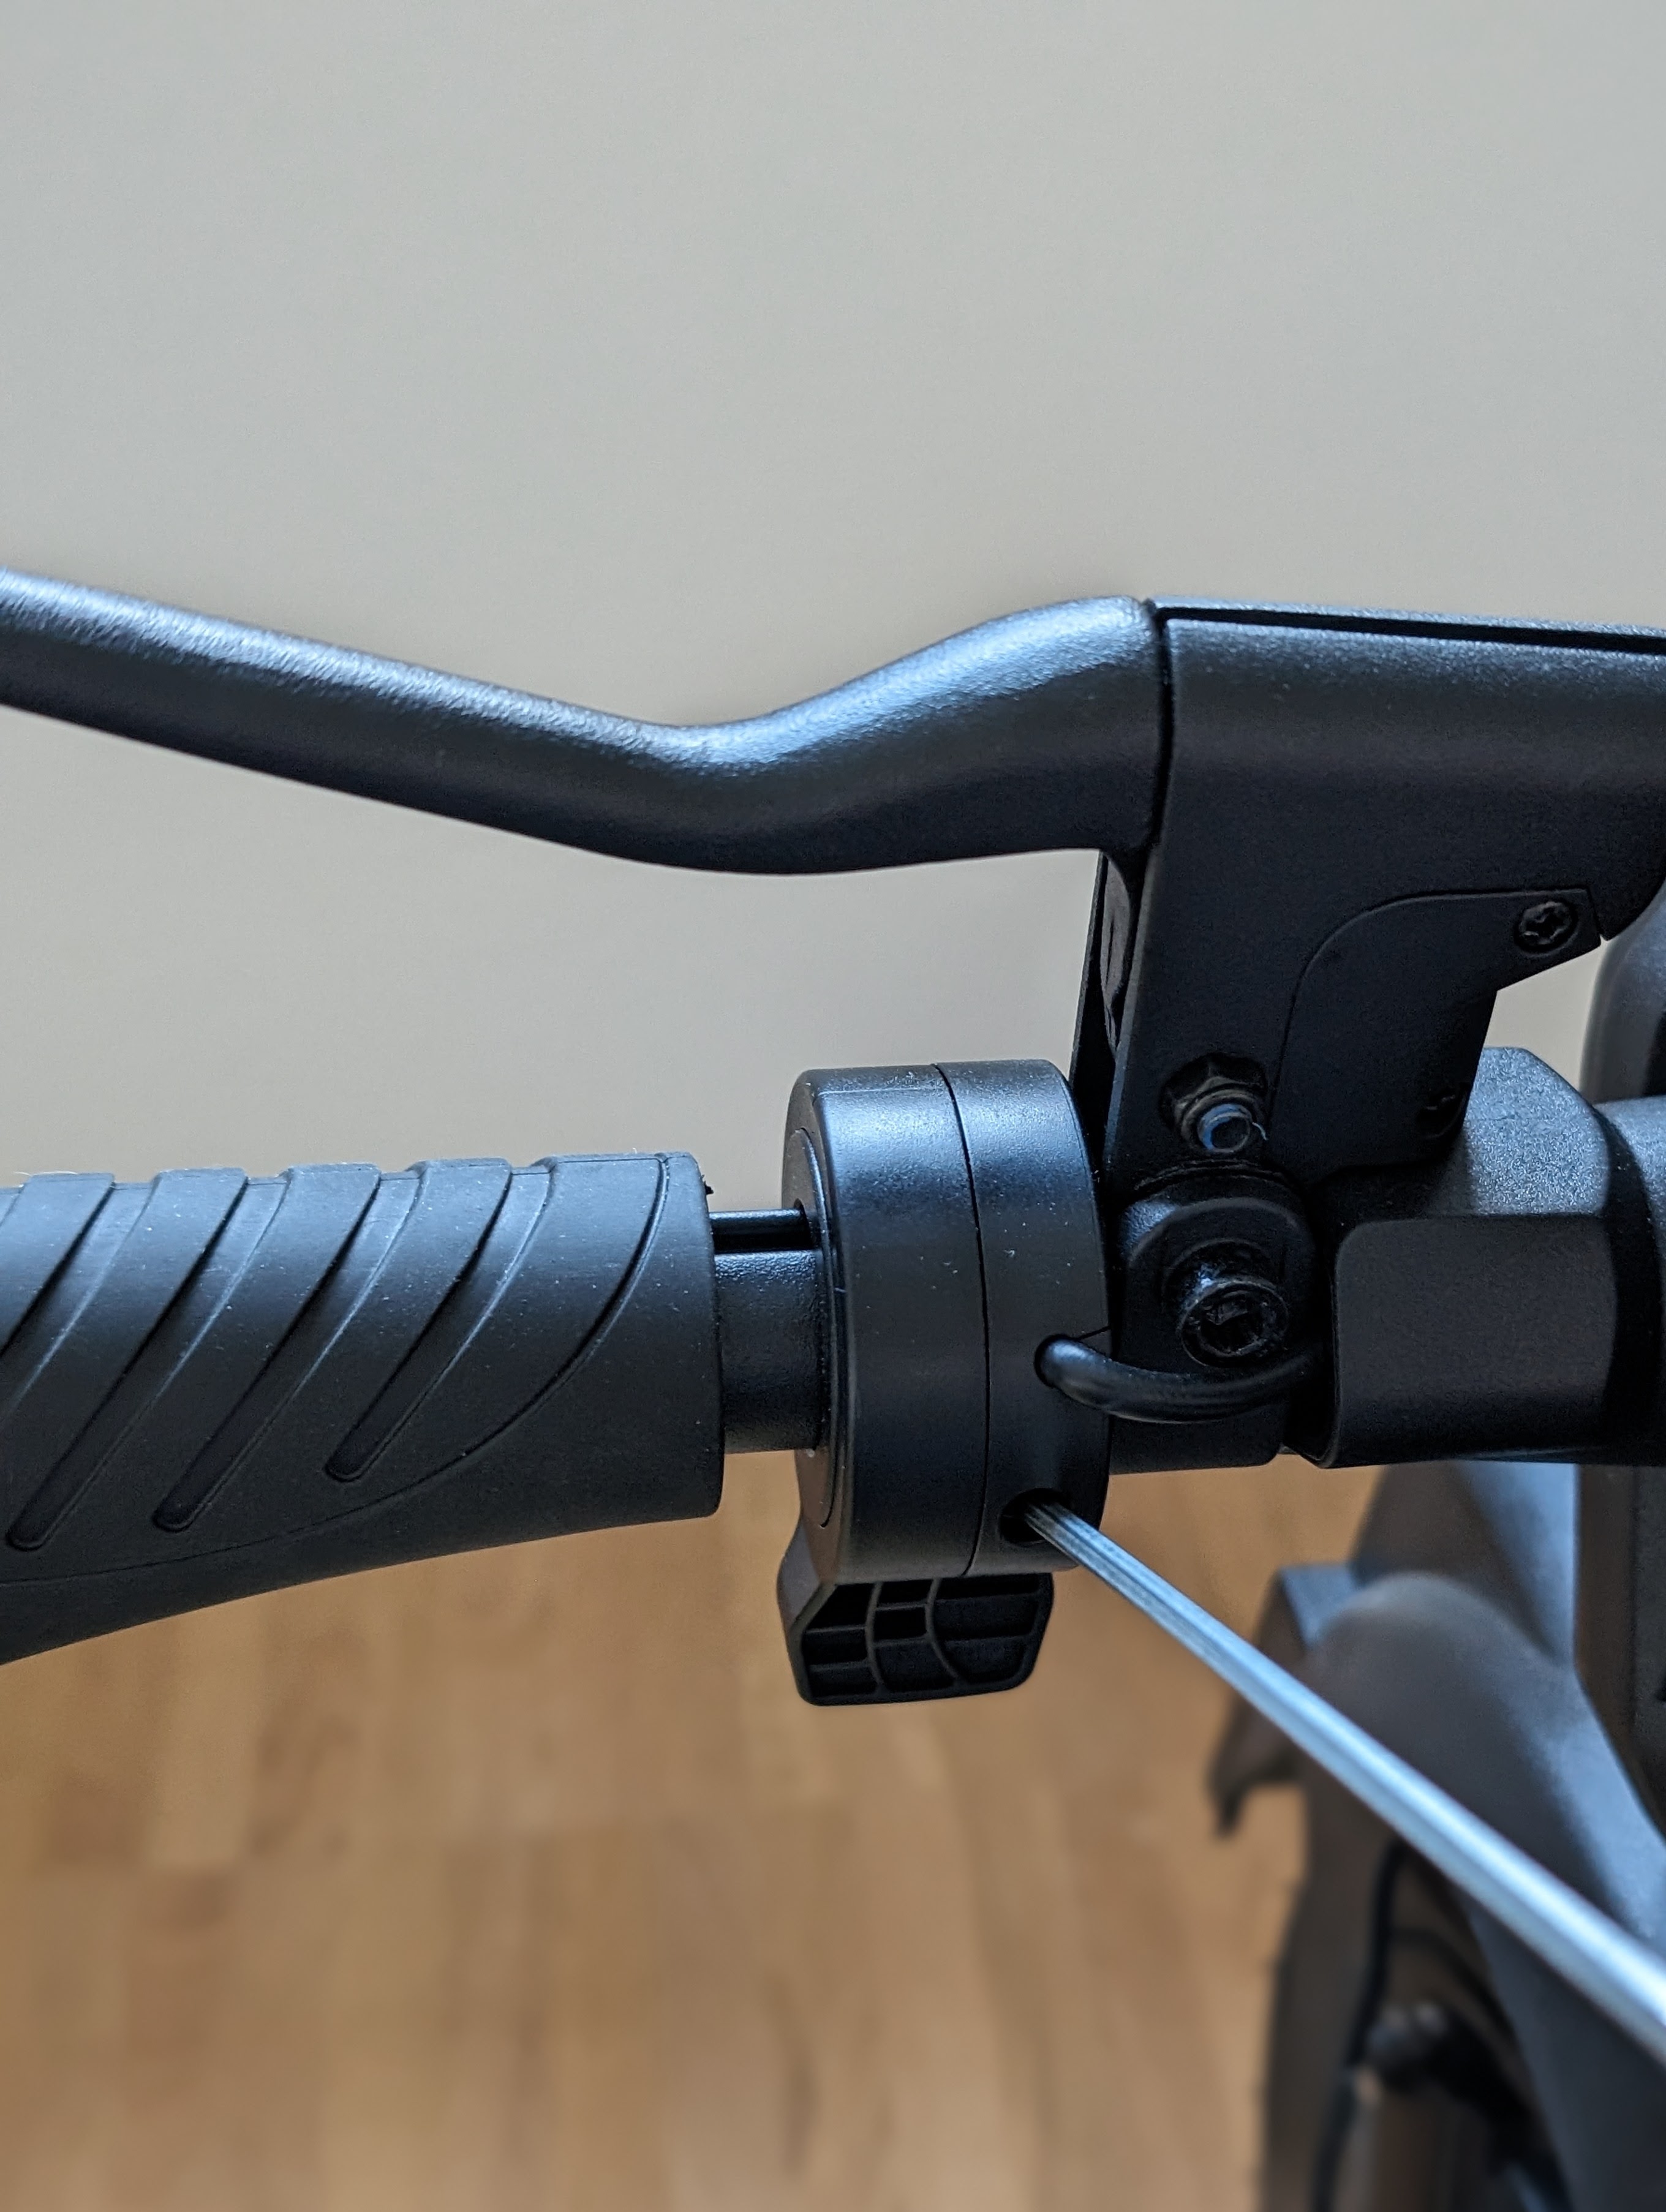
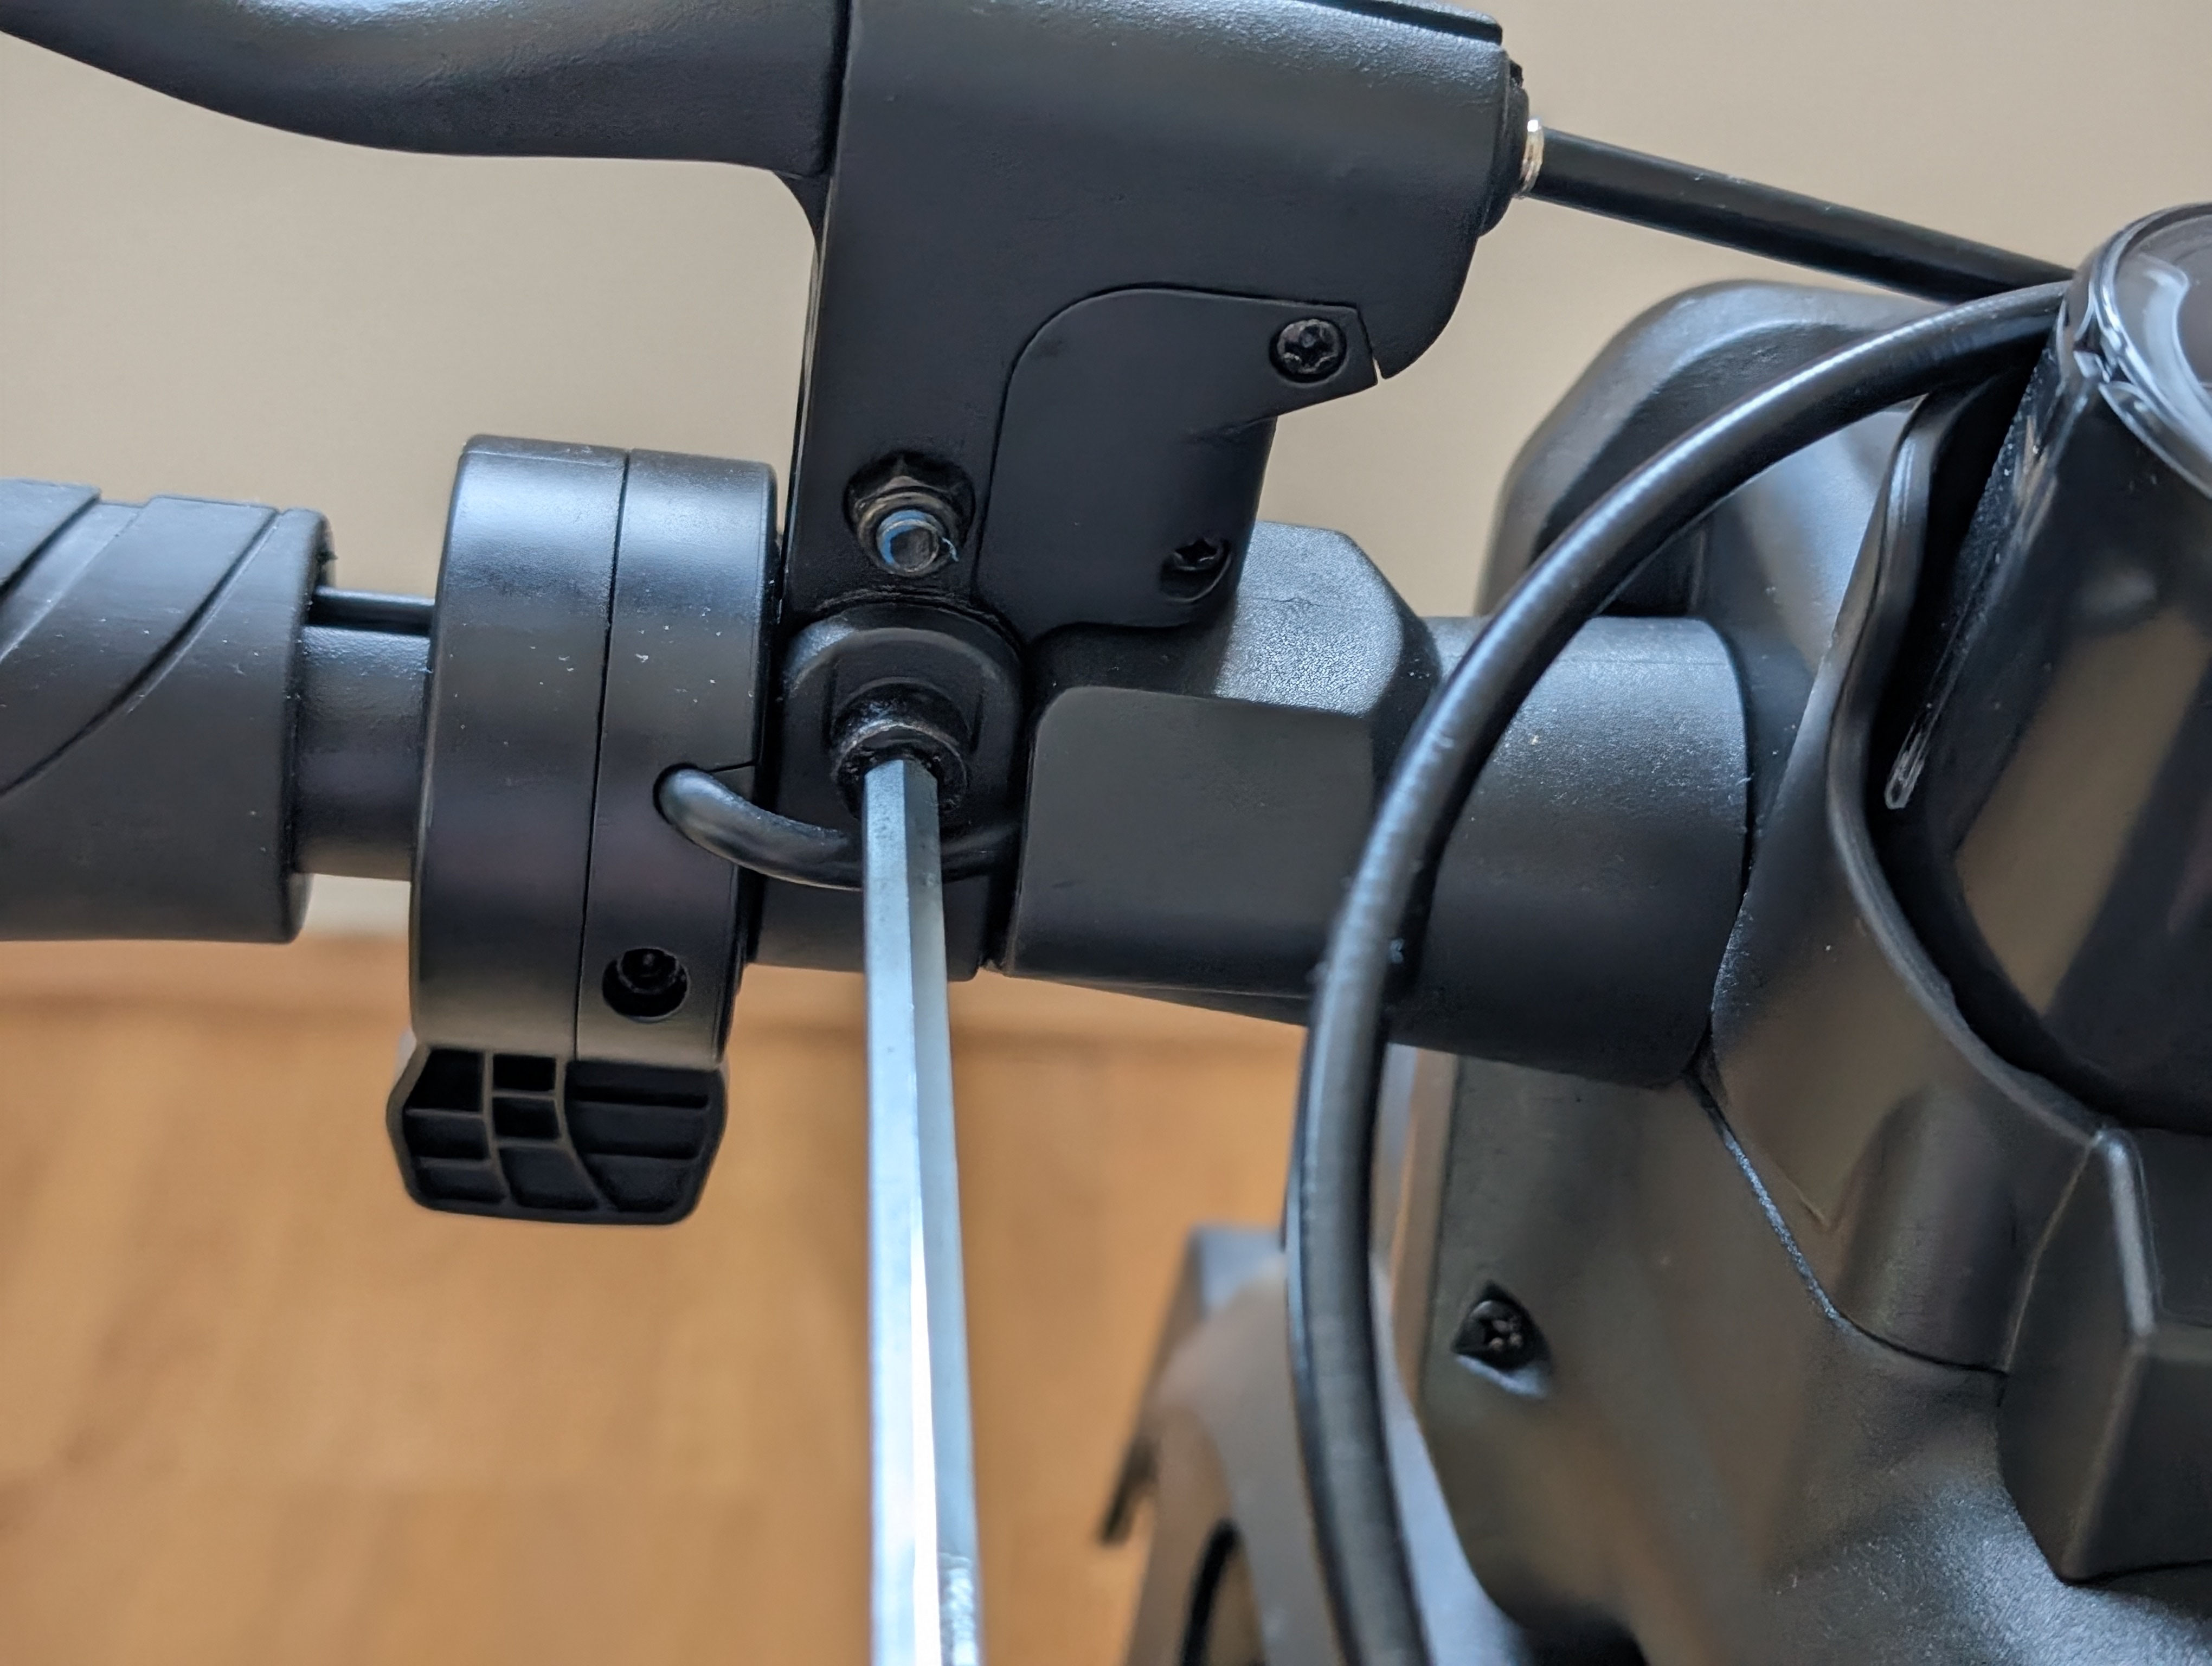
Remove the controls
Depending on the control, you'll need to loosen all the components on the corresponding side of the scooter so you can route the cables through the handlebars.
For example, remove the thumb throttle or brake lever.
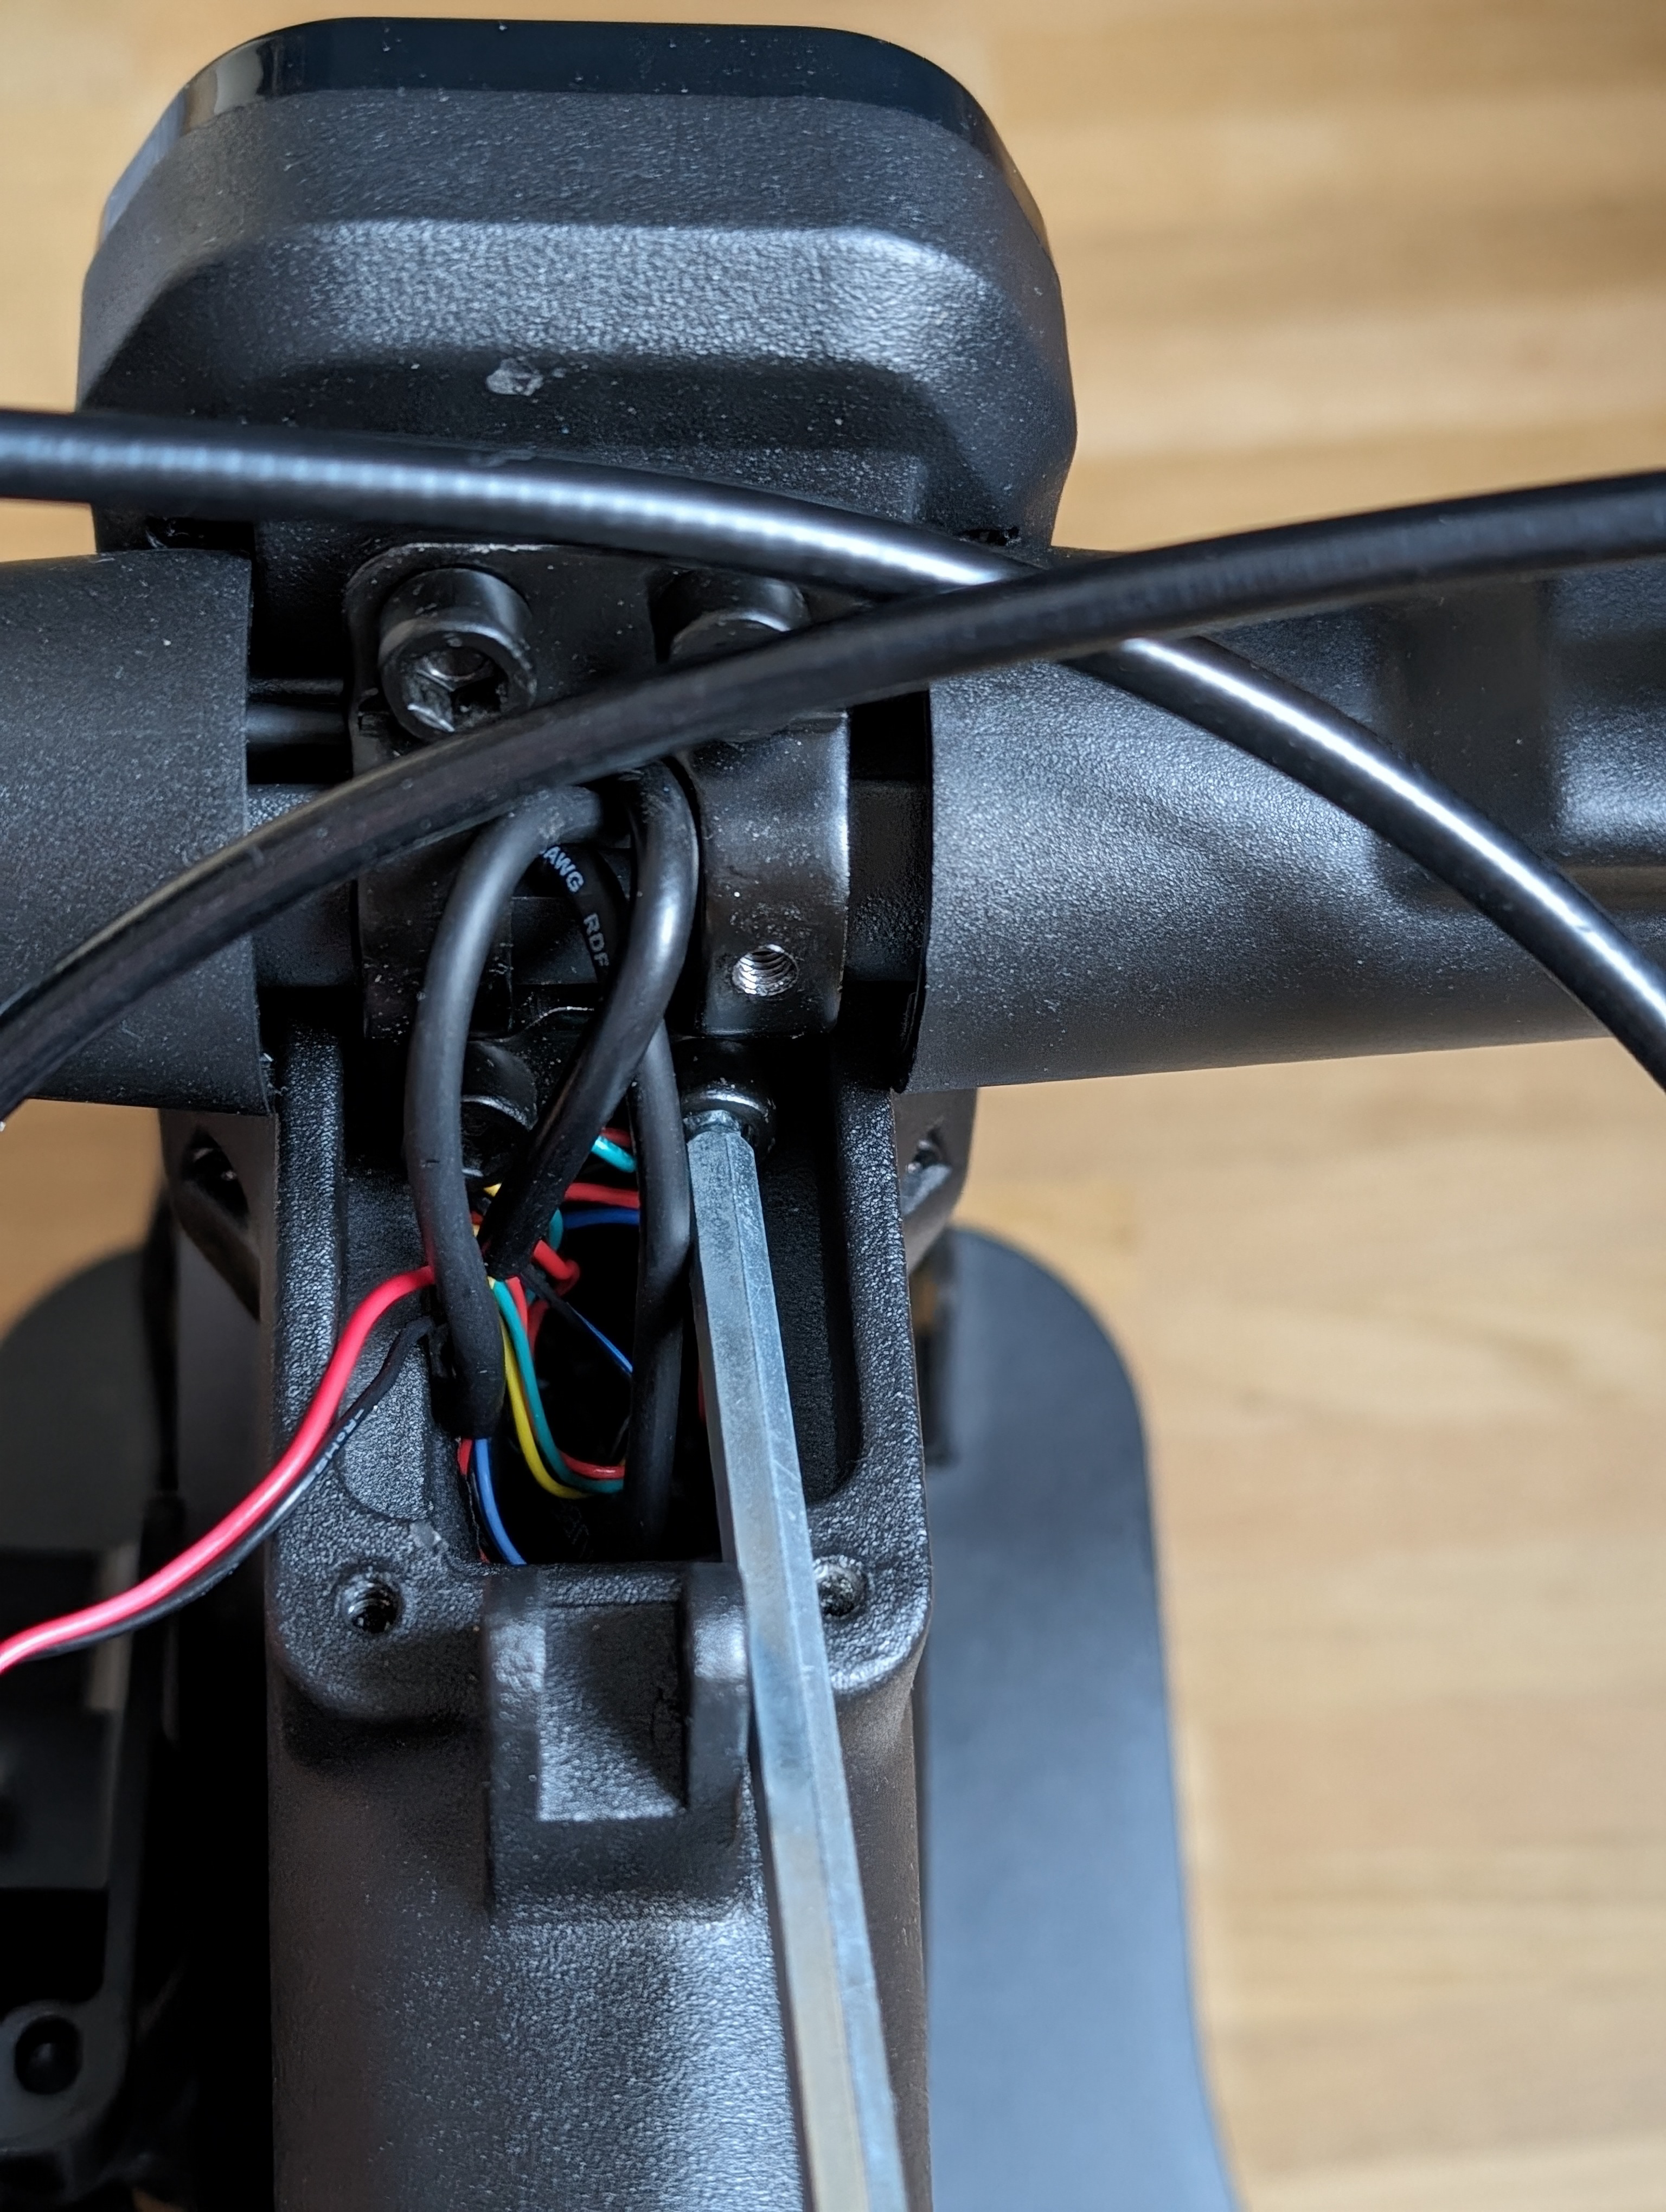
Replace and Wire the Control Element
Loosen the heat-shrink tubing on the affected components and pull them off the steering bridge.
Prepare the new heat-shrink tubing and slide it over the connectors. Then attach the new control elements and reconnect the cables.
Next, carefully insulate the connections.
Reinstall the handlebars and headlight
Reattach the handlebars to the steering head and tighten the bolts evenly.
Next, reinstall the headlight cover and the headlight itself.
Check the result
After assembly, check to make sure all controls are working properly. Pay particular attention to the throttle, brake lever, and the secure routing of the cables through the handlebars.
Frequently Asked Questions
Here you'll find answers to frequently asked questions about this repair.
Do I always have to remove the headlight?
Yes, since the wiring is located behind the headlight, you'll need to remove it to access the cables.
Can I use electrical tape instead of heat-shrink tubing?
Yes, electrical tape is an alternative. However, heat-shrink tubing usually provides a more secure and neater connection.
What should you do if a control doesn't work after replacing it?
Check the connectors and the insulation on the cables. Make sure all connections are secure and undamaged.