


In this guide, we'll show you, step by step, how to adjust the alignment of the handlebars and front wheel on your VMAX E-Scooter yourself.
Tools Required
- Allen 5 mm
Instructions
Understanding the Problem
Just like with a bicycle, you can adjust E-Scooter alignment between the handlebars and the front wheel on the VMAX E-Scooter yourself if necessary.
If the handlebars are crooked even though the bike is straight, this may be caused by a slight twist.
Loosen the clamping screws
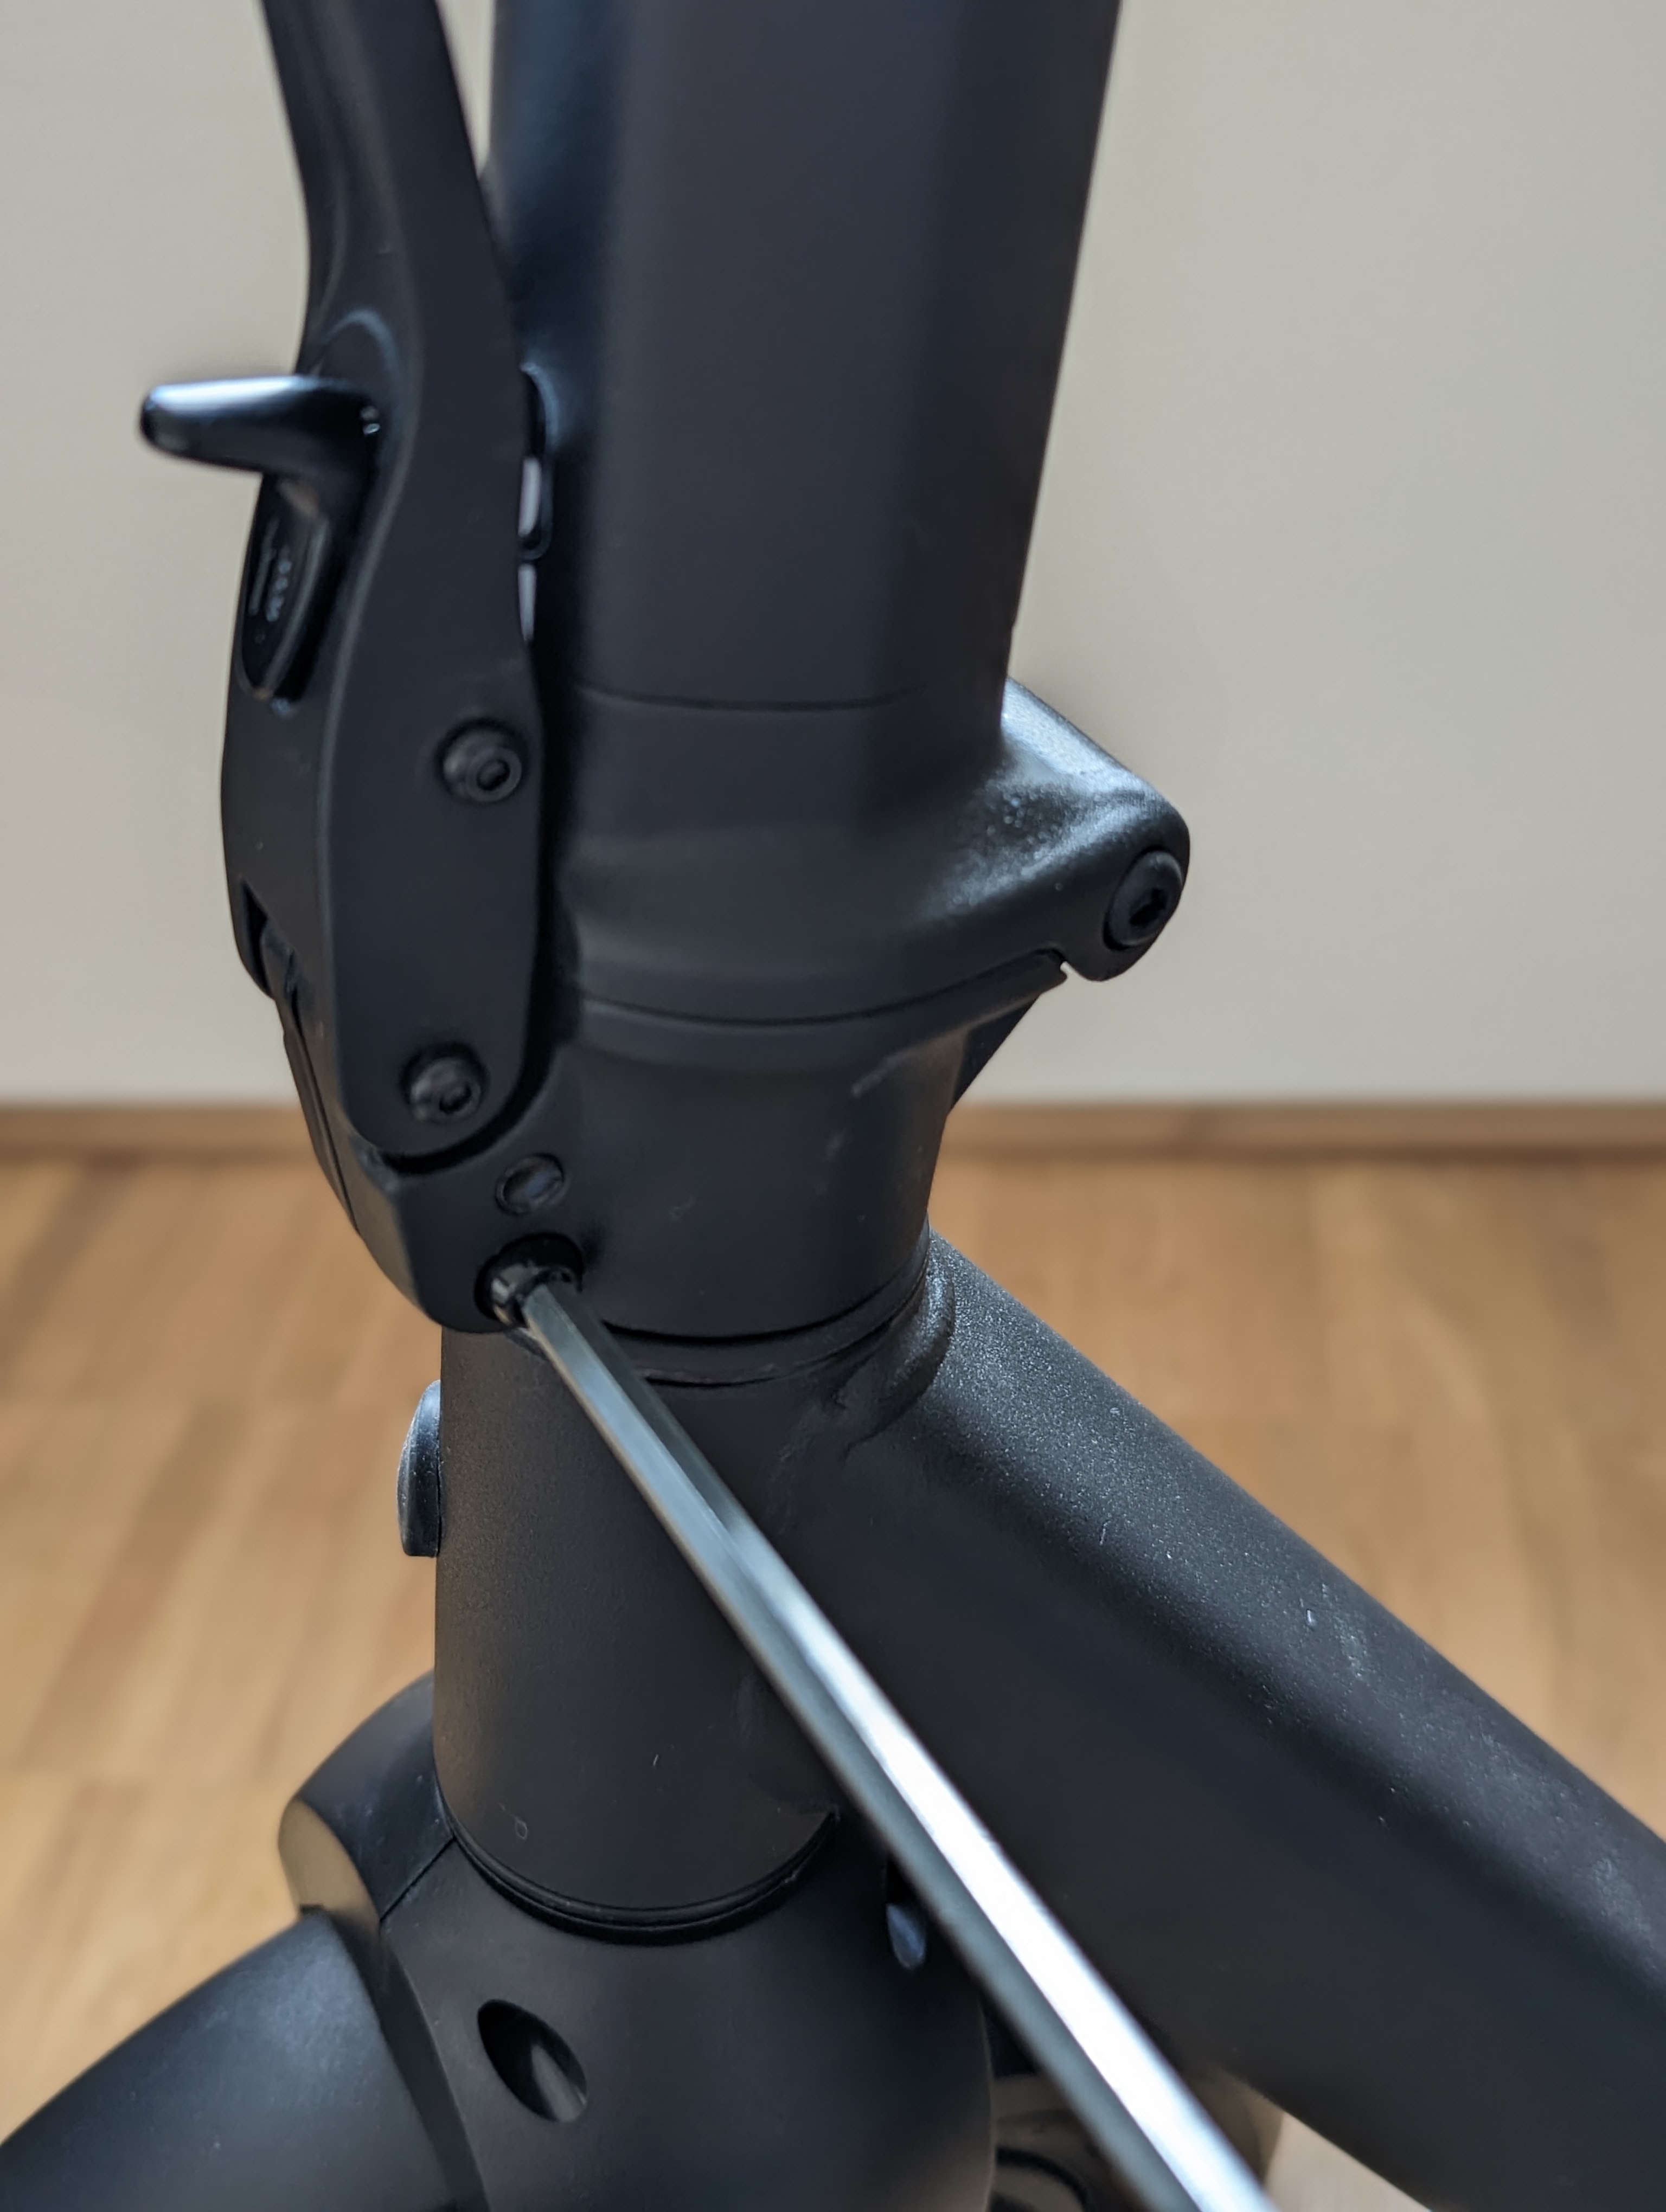
Loosen the two clamping screws on the front wheel using a 5 mm Allen wrench.
Loosen the second clamping screw
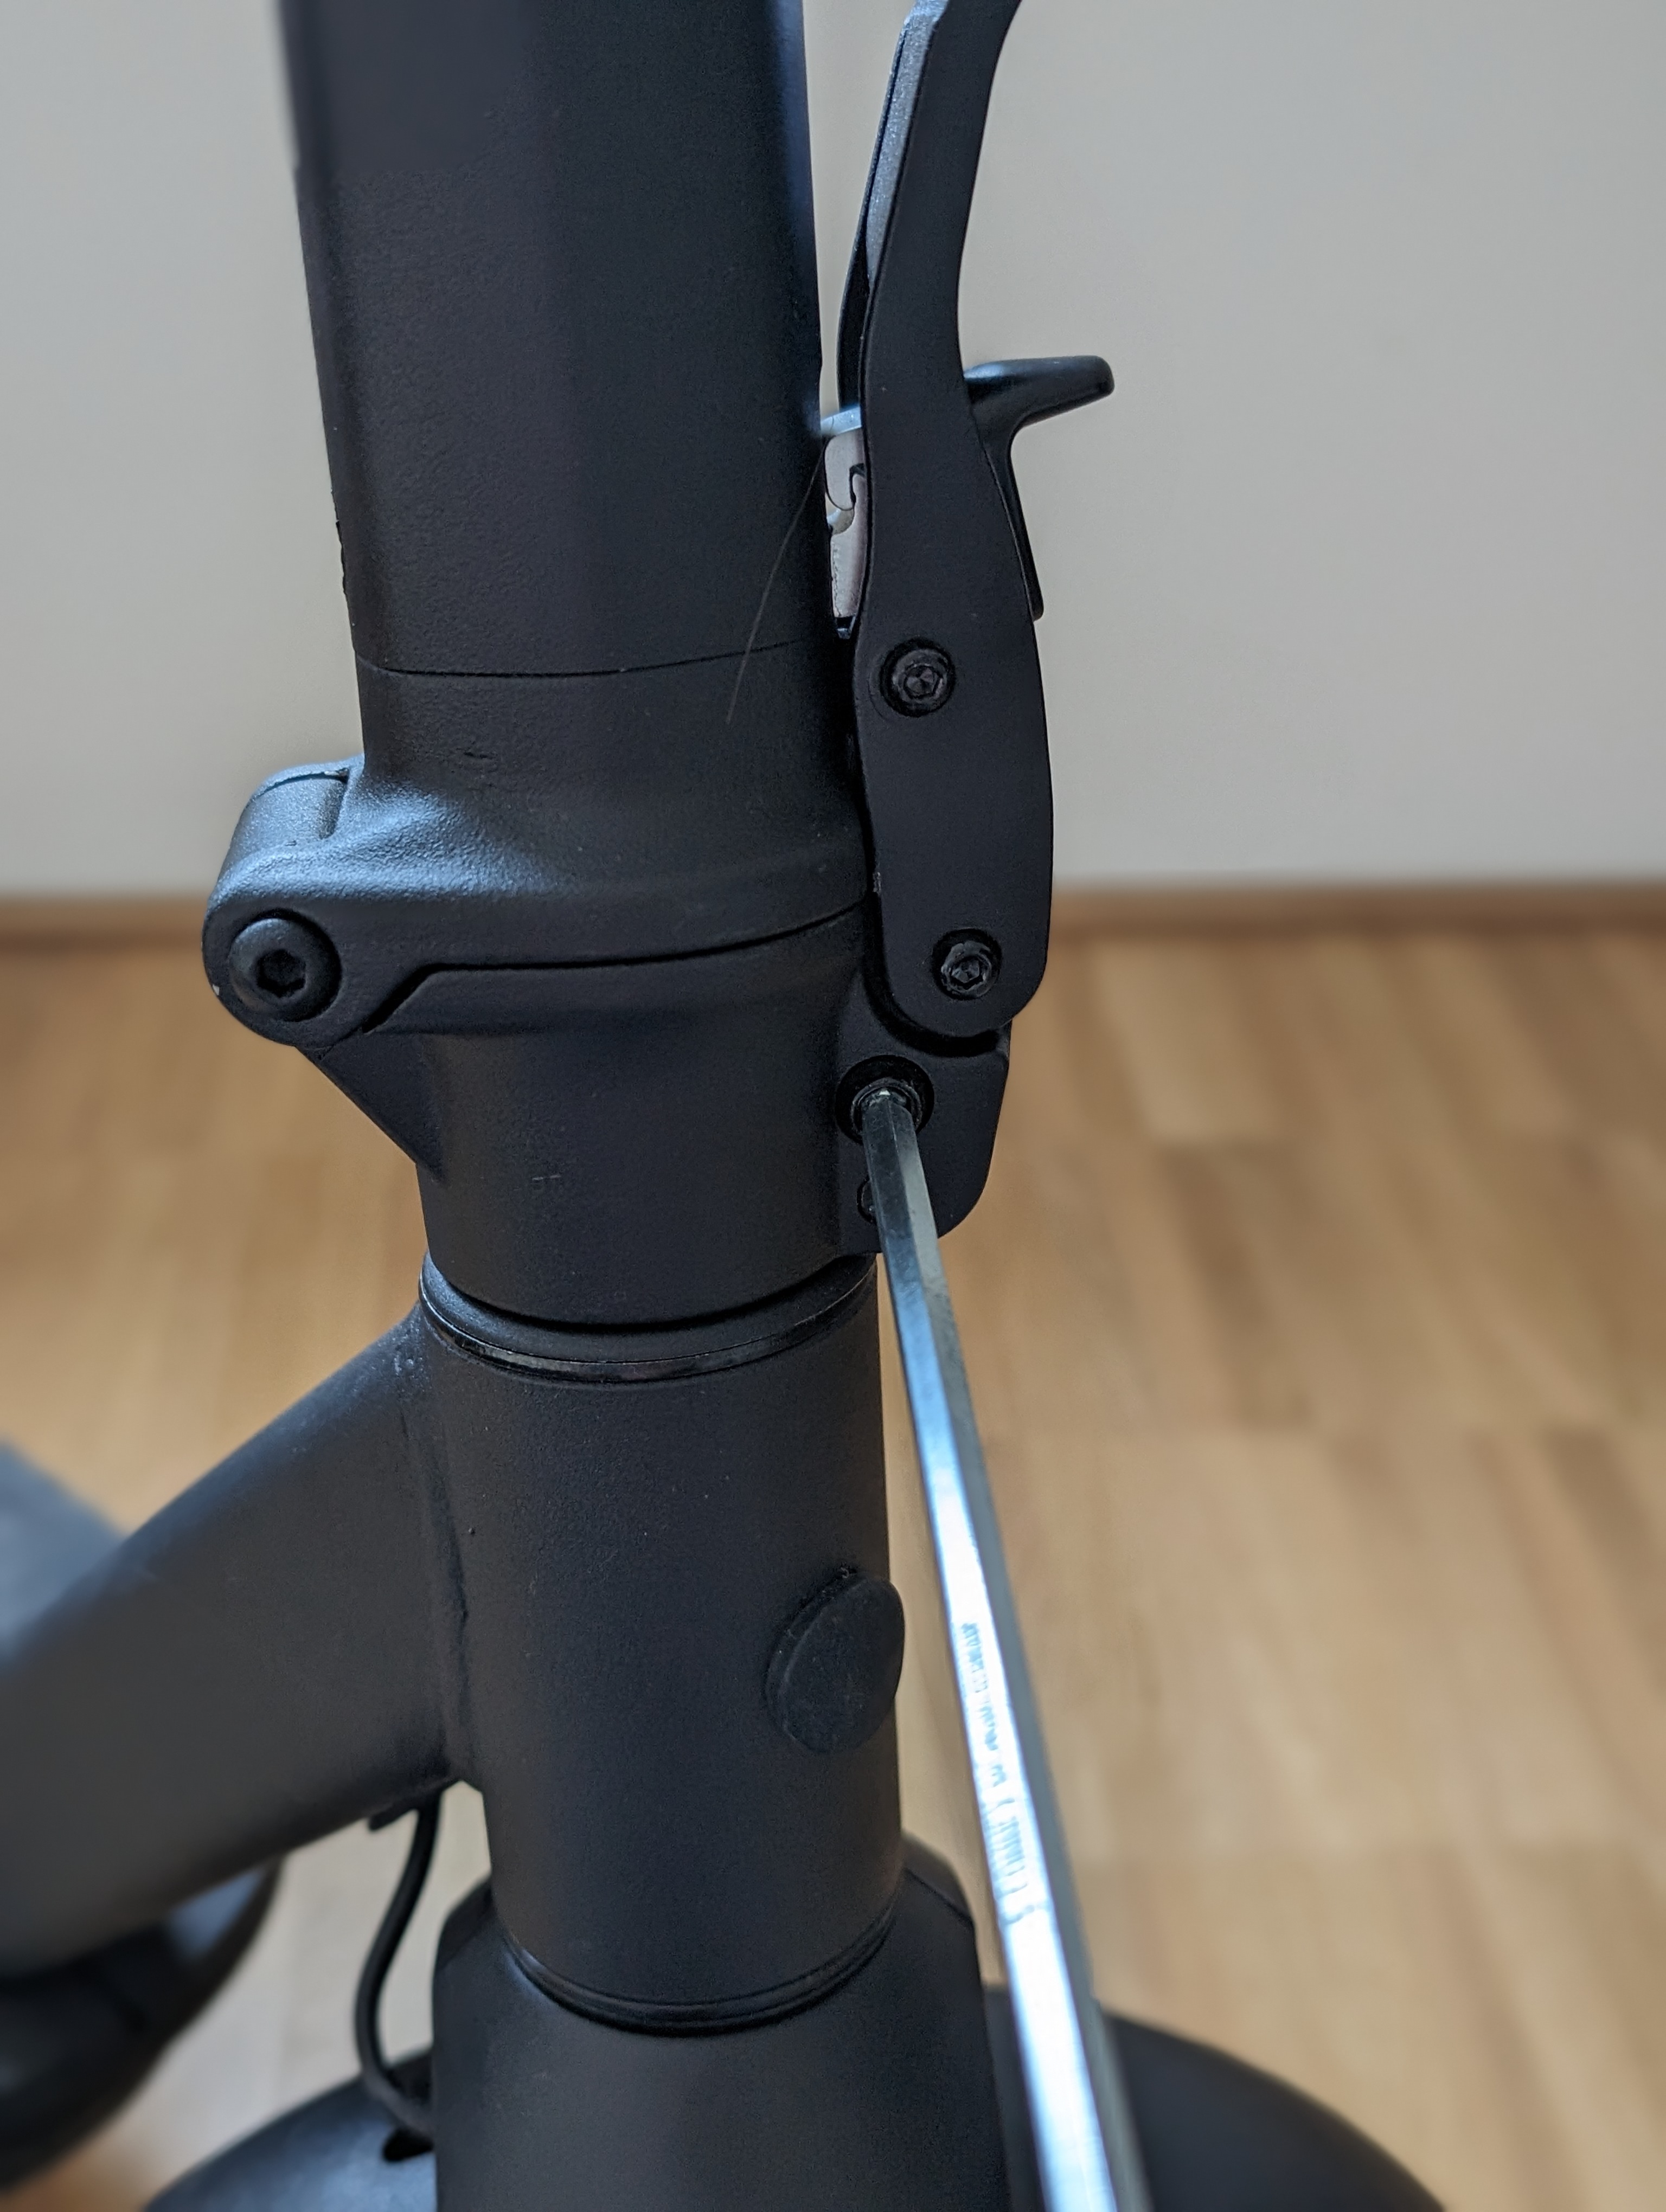
Loosen the second clamping screw as well so that the handlebars can be freely adjusted.
Align the handlebars
Place the front wheel between your legs and straighten the handlebars.
Make sure the handlebars and wheel are exactly in line.
Retighten the screws
Next, tighten both screws alternately so that the handlebars are secured evenly.
Check the result
After making the adjustment, check to see if the handlebars are aligned straight and if the front wheel is moving smoothly in the direction of travel. Also check that the clamping screws are tight.
Frequently Asked Questions
Here you'll find answers to frequently asked questions about this repair.
Why does the handlebar move out of place in the first place?
Transport, bumps, or vibrations can cause the connection between the handlebars and the front wheel to twist slightly. In many cases, this can be quickly corrected.
How tight should the screws be tightened?
The screws should be tight without being overtightened. Tighten them evenly and alternately to ensure they are securely fastened.